![[C# Helper]](../banner260x75.png)
|
|
 |
![[Beginning Database Design Solutions, Second Edition]](db2_79x100.png)
![[Beginning Software Engineering, Second Edition]](book_sw_eng2_79x100.png)
![[Essential Algorithms, Second Edition]](book_algs2e_79x100.png)
![[The Modern C# Challenge]](book_csharp_challenge_80x100.jpg)
![[WPF 3d, Three-Dimensional Graphics with WPF and C#]](book_wpf3d_80x100.png)
![[The C# Helper Top 100]](book_top100_80x100.png)
![[Interview Puzzles Dissected]](book_interview_puzzles_80x100.png)
![[C# 24-Hour Trainer]](book_csharp24hr_2e_79x100.jpg)
![[C# 5.0 Programmer's Reference]](book_csharp_prog_ref_80x100.png)
![[MCSD Certification Toolkit (Exam 70-483): Programming in C#]](book_c_cert_80x100.jpg)

Title: Find the ListView row and column under the mouse in C#
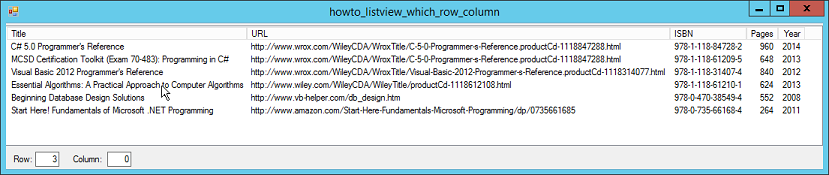
This example shows you the ListView row and column under the mouse when the mouse moves over the ListView control. (You could modify the program to display the row and column when you click on the control instead of just moving the mouse over it.) There are three interesting pieces to this example. First, the FindListViewRowColumn method shown in the following code finds the row and column under the mouse.
// Find and column at this position. // Return true if we are successful. // Return false if the mouse is not under a ListView cell. static public bool FindListViewRowColumn( this ListView lvw, int x, int y, out int row, out int column) { // Find the row under the mouse. for (int i = 0; i < lvw.Items.Count; i++) { if (lvw.Items[i].Bounds.Contains(x, y)) { row = i; // See which column is under the mouse. column = GetListViewColumn(lvw, x); return true; } } row = column = -1; return false; } The code loops through the control's rows, checking to see whether an item's bounds contain the point. When it finds the row that contains the point, it saves the row number and calls the following GetListViewColumn method to find the column at that point.
// Return the column under this X position.
static public int GetListViewColumn(this ListView lvw, int x)
{
// Get the horizontal scroll bar's position.
x += GetScrollPos(lvw.Handle, SB_HORZ);
// Get the column headers in their current display order.
List This method does three tricky things. First, it calls the GetScrollPos API function to see where the ListView's horizontal scroll bar is and adds that amount to the X coordinate. For example, if the control's items are scrolled 100 pixels to the left, then the X coordinate over the items is really 100 pixels greater than it appears on the screen. In other words, the position over the items would be 100 pixels farther to the right if the items were not scrolled. Second, the code calls GetListViewColumnsInDisplayOrder to get the control's columns in the order in which they currently appear on the screen. If the ListView's AllowColumnReorder property is true, then the user may have dragged the columns into new positions. This step lets the code consider the columns in their current order rather than their original order. The third clever thing GetListViewColumn does is it loops through the columns (in their current order) subtracting their widths from the X value. When X <= 0, the code has just passed the column that contains the original X coordinate value. The GetListViewColumnsInDisplayOrder method shown in the following code returns a List giving the ListView's column headers in their current order.
// Return the ListView's columns in their display order.
static public List This method simply loops through the ListView control's Columns collection searching for the column header with DisplayIndex value 0, 1, 2, and so forth, adding the column headers to the result List in order. When it finishes, it returns the result.
Richard Moss pointed out (see the comments) that the ListView control has a HitTest method that does much of this work for you. I've revised the code to use either method. Here's the new code.
// Method 2: Use HitTest. ListViewHitTestInfo hti = lvwBooks.HitTest(e.Location); if (hti.Item == null) return; ListViewItem item = hti.Item; txtRow.Text = item.Index.ToString(); // See which sub-item this is. ListViewItem.ListViewSubItem subitem = hti.SubItem; for (int i = 0; i < item.SubItems.Count; i++) { if (item.SubItems[i] == subitem) { txtColumn.Text = i.ToString(); } } The code still needs to do some work to find the index of the sub-item under the mouse if you want that sub-item's index. This method is probably better if for no other reason than it avoids using the API GetScrollPos function. The sub-items also have a Bounds property that you can use to see whether the mouse is under a sub-item. Unfortunately the first sub-item, which represents the item as a whole, has bounds that include the entire row, so it doesn't help you determine whether the mouse is under the first column.
Mark Prichard added another twist. Instead of digging through the Subitems collection to find the sub-item, you can just use the collection's IndexOf method. Nice!
// Method 3: Use HitTest and IndexOf. ListViewHitTestInfo hti = lvwBooks.HitTest(e.Location); if (hti.Item == null) return; ListViewItem item = hti.Item; txtRow.Text = item.Index.ToString(); // See which sub-item this is. txtColumn.Text = item.SubItems.IndexOf(hti.SubItem).ToString(); Download the example to experiment with it and to see additional details. |